As we mentioned in our Whiteout Survival guide, this game offers a thrilling gameplay experience, combining strategy with PvP combat. And with that in mind, your goal is to protect your City, including your troops, and resources against all sorts of threats. In this guide, we’ll be discussing the best strategies and tactics to properly defend your City in Whiteout Survival.
How to defend your city in Whiteout Survival
Here are a few essential tips to help you defend your city against unwanted attacks from other players so you can focus on rebuilding and prospering your frozen settlement.
Upgrade the Barricade


The first step to protecting your City in Whiteout Survival is by leveling up the Barricade, which is your City’s main gate. This requires not only a certain amount of resources and is essential for any defense strategy.
In addition to resources, you will need to increase the Furnace to specific levels as well. For example, Barricade level 5 requires Furnace level 16.
Upgrading the Barricade will make it more difficult for enemies to breach your walls and completely burn your City. This is crucial because once your City is completely burned, will be automatically teleported randomly on the map, and teleport items are not that easy to get.
Additionally, you should assign your strongest heroes to guard the Barricade. You can use this Whiteout Survival tier list to choose the best ones for your City’s defense.
To assign heroes, tap the Barricade, and select the “City Defense” option. On the 3 hero slots at the top, pick your most powerful heroes for each type of unit, and click “Save”.
Level up the Storehouse
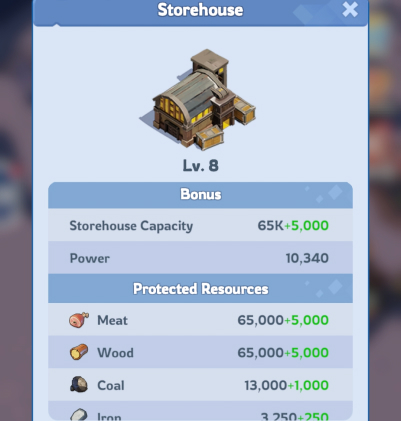
The next important step for defending your City is to upgrade the Storehouse. This building increases the number of resources you can store, and it also serves as a protective shell for your resources.
This means that attackers won’t be able to steal your resources if the amount of resources in your Storehouse is equal to or below the protection amount. You can check this number by tapping the Storehouse building and selecting the “Details” option.
That’s why is essential to upgrade your Storehouse so you can protect more resources from enemy raids.
Research Defensive Techs
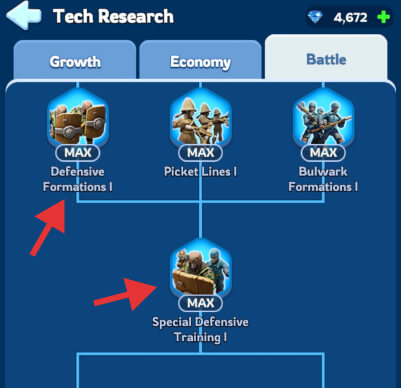
While techs that improve your troop’s attack and power are important, researching defensive techs is also essential. Defensive techs are useful in various situations as they can reduce damage taken by your troops in any gameplay mode, whether PvE or PvP.
Higher troop defense means fewer chances to get your troops severely wounded in battle. The first techs you should research to increase your troop’s defense are usually located on the left side of the Battle tech tree in the Research Center building.
This includes Defensive Formations, Shield Upgrade, Survival Techniques, and Special Defensive Training. These techs have multiple levels and types (1,2,3, etc.).
Increase the Infirmary capacity and healing speed
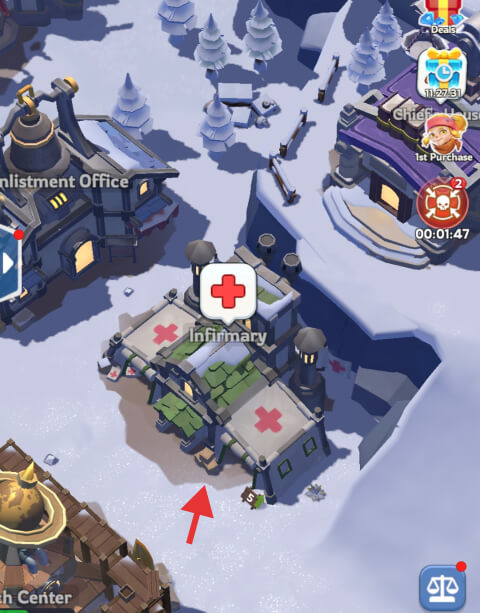
The Infirmary building is where your wounded troops are sent to recover. Upgrading this building will help your injured troops get back on their feet faster, and increase the maximum allowed number of severely wounded troops.
This is very important because if the number of severely wounded troops number exceeds the maximum capacity of the Infirmary, those troops will be lost.
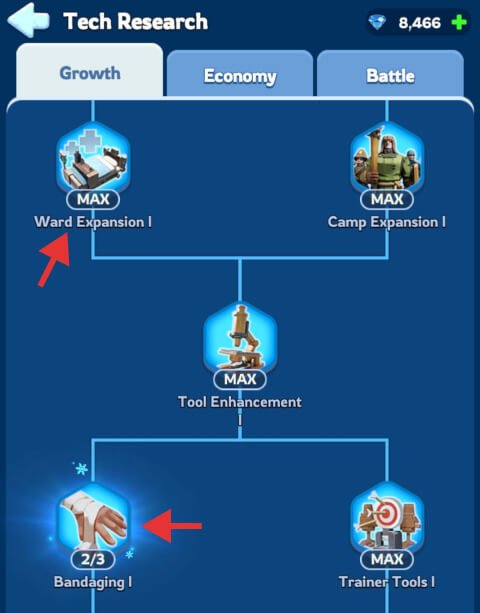
Another way to increase your Infirmary capacity and healing speed is by researching the Ward Expansion and Bandaging techs under the Growth tech tree.
Join a powerful Alliance
To protect your city in Whiteout Survival, you should also consider joining a powerful Alliance. Being part of an Alliance is important because it gives you access to more resources that you can use to improve your City’s defense and many other benefits.
One of the main benefits is that on most servers, the top 10 alliances have a NAP (no aggression pact) between them, which means they will not attack each other, their farm accounts, or farm alliances.
Use a City Protection Shield
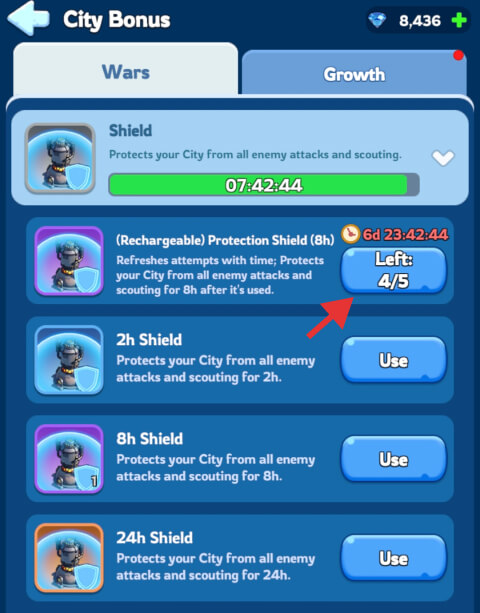
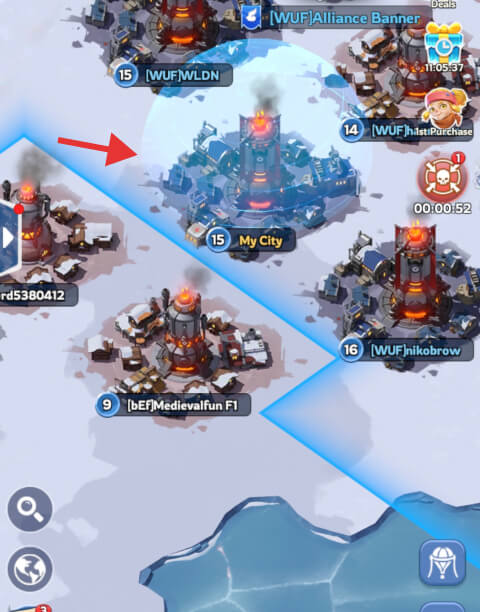
City Protection Shields are the only thing that can fully defend your City in Whiteout Survival, as well as your resources from being raided by other players while you are offline. The good news is that this game offers you up to 5 free 8h Protection Shields that you can use regularly.
The 5 free shields have a 7 days cooldown, so you should use them wisely to ensure your City is fully protected.
Additionally, you can obtain individual Protection Shields from missions and events or buy them if you have enough Gems. They can have a duration of 2h, 8h, or 24h, where the 24h Protection Shield costs 4800 Gems.
Protection Shields can be found under the City Bonus menu, which can be accessed by selecting the “City Bonus” option after tapping your city from the world map view, or by tapping the little arrow pointing upward, visible below your avatar.
Upgrade & Promote your units
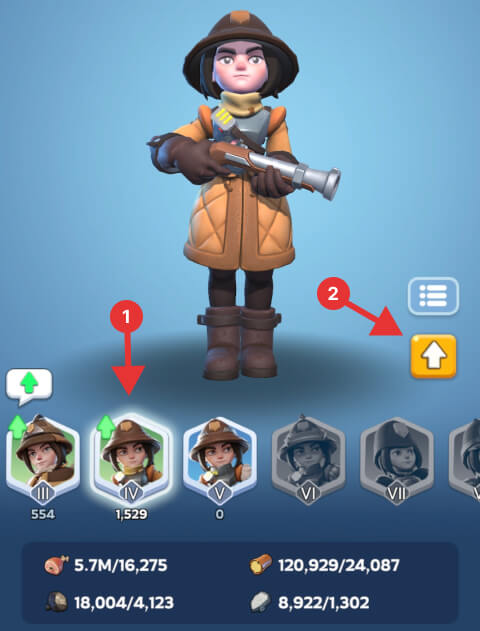

The stronger units you have in your formations, the better the chances of surviving enemy attacks are. In this game, there are two main ways through which you can increase your troops’ power.
The first way is upgrading the military unit buildings, Infantry Camp, Lancer Camp, and Marksman Camp. This will allow you to unlock higher troop tiers and train more powerful units.
The second one is promoting your troops, which increases the stats and tiers of your current units. This feature becomes available after upgrading any of the 3 mentioned buildings to level 13.
Once it becomes available, tap any lower-tier unit and hit the green arrow as you see in the above image. Next, drag the slider to the right to determine the number of units to be promoted, and hit “Promotion”.
Use a Defense boost or a Counter-recon
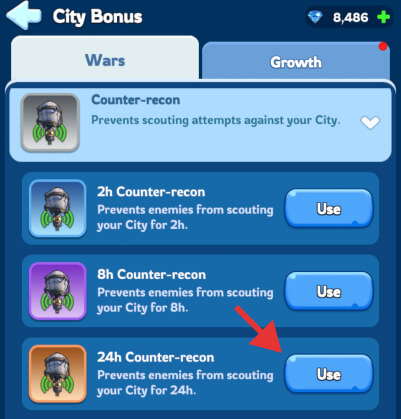
All of the above methods are essential for keeping your City safe, but you can also augment your troop defense with one of the two defensive boosts available in the City Bonus menu in Whiteout Survival.
The first boost item is called Counter-recon and protects your City from being scouted by other players. This item is really useful if you want to hide your resources from rivals, especially while taking part in PvP activities. There are 3 variants available, 2h, 8h, and 24h, the latter costing 4,800 Gems.
The other defensive boost is called Troops Defense and there are two variants available. The first option has a 2h duration, increases your troops’ defense by 10%, and costs 2,000 Gems. The other one has a 12h duration, can increase your troops’ defense by 20%, and costs 20,000 Gems, which is a lot.
Use a Random Teleporter
The last defensive strategy we recommend having a few Random Teleporters on hand. Using this item teleports your city to a random location on your server’s map.
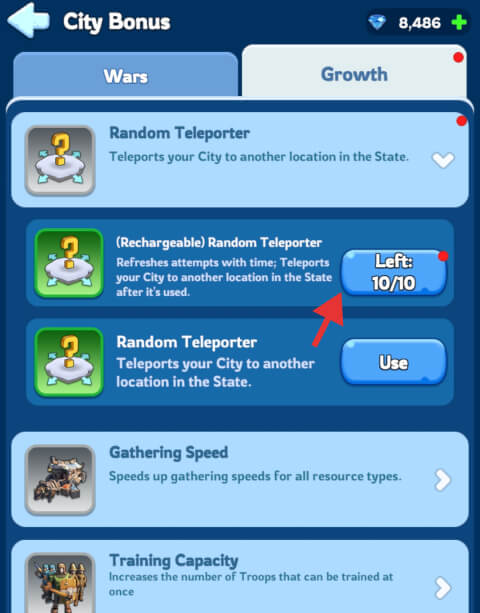

Although the game offers up to 10 Rechargeable Random Teleports to be used, they have a quite long cooldown, but you can as well purchase or obtain some individual items. Having a few of these items on hand is useful, especially in case of an incoming attack and not having a Protection Shield.
You could also use them to quickly teleport your city after a successful attack on other players. Random Teleporters can be purchased from the City Bonus menu and cost 1,000 Gems a piece. You might as well use an Advanced Teleport, which teleports your city to a specific location on the map.
Both Teleports can also be obtained from missions, events, and from the Alliance Shop, where they are usually well discounted.
Conclusion
This guide gave you the most effective methods to protect your City in Whiteout Survival and resist enemy attacks. It is important to remember that the only way to fully protect your City is by using a City Shield.
Make sure you have at least one in your bag, or the required Gems to buy one quickly in case of an emergency. Follow these methods and strategies and you will be sure to keep your City safe in Whiteout Survival.


