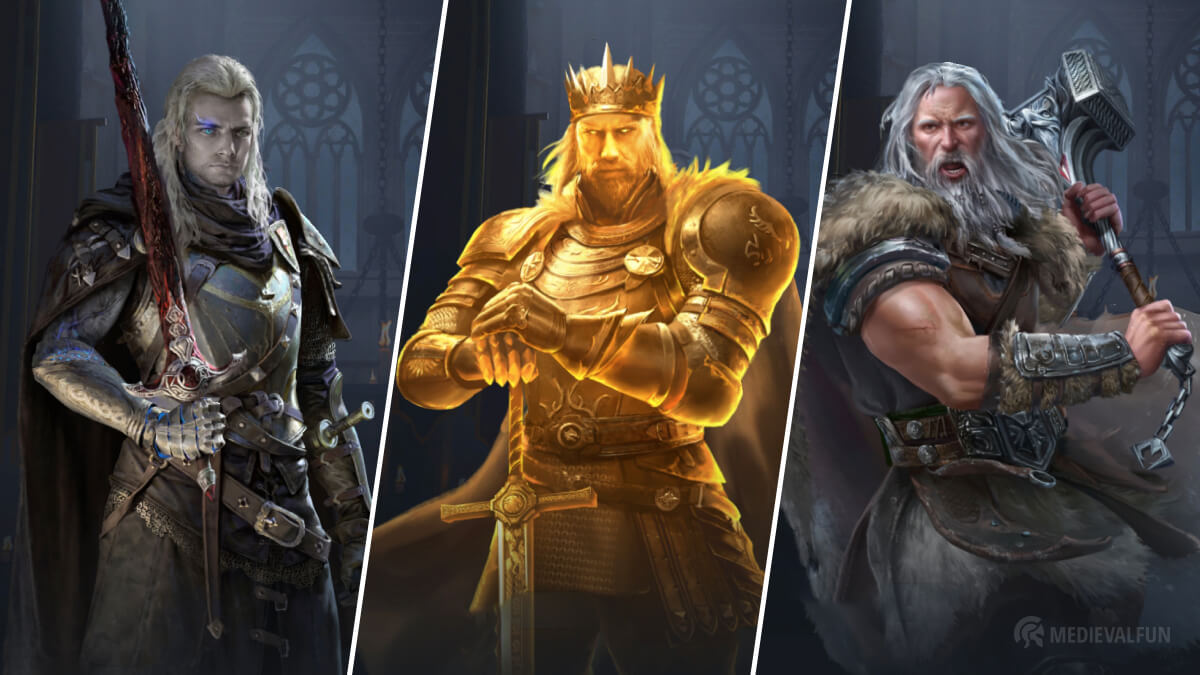
King of Avalon Frost and Flame, the newest version of King of Avalon, is an amazing medieval mobile strategy game with a ton of content to explore. Still, all these options and features can be overwhelming at first. Here are some tips to help you get started with this strategy mobile game and speed up your progress.
15. Complete Lord’s Reign missions
Lord’s Reign campaign in King of Avalon offers you a special series of missions with amazing rewards. After accessing the Lord’s Reign by tapping the tower icon at the bottom of your screen, you will see a map full of different missions classified according to their difficulties.
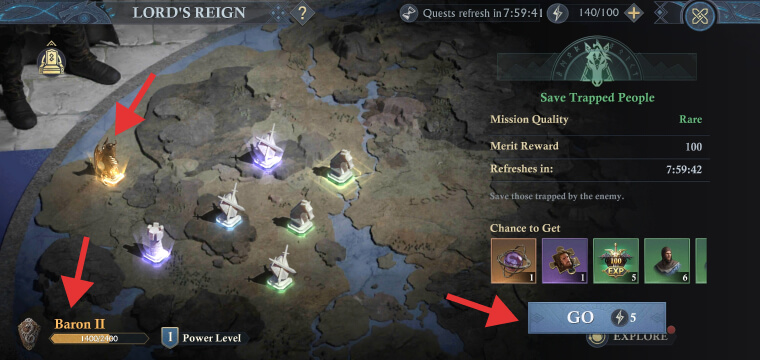
They range from Rare (green color), Epic(blue), Legendary(purple), and Mythic (orange), where Mythic offers the best rewards but is also the most challenging.
Each mission costs a small amount of lord stamina (you can check your stamina level by tapping your avatar, the green bar at the bottom, below the EXP blue bar). Upon completion, you will receive a reward pack containing different types of items/resources, including Lor EXP, Hero EXP, units, Exploration Points, and much more.
Another great thing about the Lord’s Reign is that each mission also offers you Merit Points, which are automatically used to upgrade your Noble Rank, which ranges from Baronet 1 up to Marquis 5. Jumping from one rank title to another is not as easy as you think because each title has 5 sub-levels.
For example, you need to progress from Baronet 1 to Baronet 5 before being able to unlock the Baron rank. The higher your Noble Rank, the better rewards you will gain from completing missions as well as rewards offered for each Noble Rank completion.
14. Progress through the Path of Legend mode
King of Avalon has plenty of events and activities that will keep you occupied, but if you’re looking for something truly challenging and rewarding, you should look no further than the Path of Legend campaign. It’s a special campaign mode that pits you against powerful enemies across multiple chapters.
Each chapter has its own powerful boss and several stages that need to be cleared across the exceedingly large map to unlock the next chapter. The more chapters you complete, the better rewards you’ll earn.
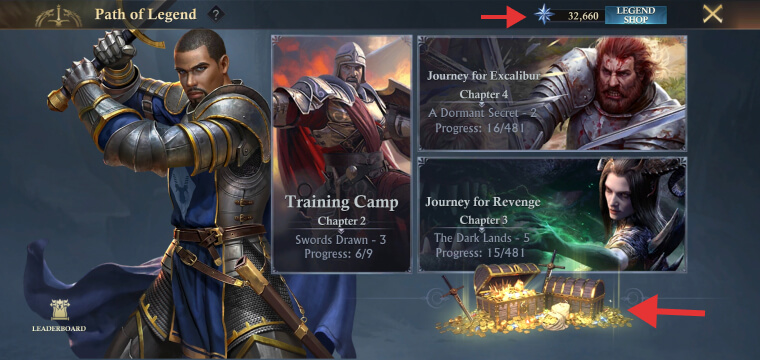
The Path of Legend can be accessed once your Stronghold reaches level 10. You can then enter by simply tapping the ship visible next to your kingdom’s gate, and once you’re in the Path of Legend, you can start the first chapter. As you progress, you will gain special rewards that can be used to upgrade your heroes and troops in the game. But besides these rewards, you can also claim the Adventure Rewards.
This bonus reward can be claimed every 10 hours and contains a certain number of Traveler’s Insignia, a special item that can be exchanged for great rewards in the Legend Shop.
To collect your daily Traveler’s Insignia, tap the gold chests you see in the above screenshot. The more you progress through the Path of Legends, the more Traveler’s Insignia you will receive every day.
13. Clear all the obstacles
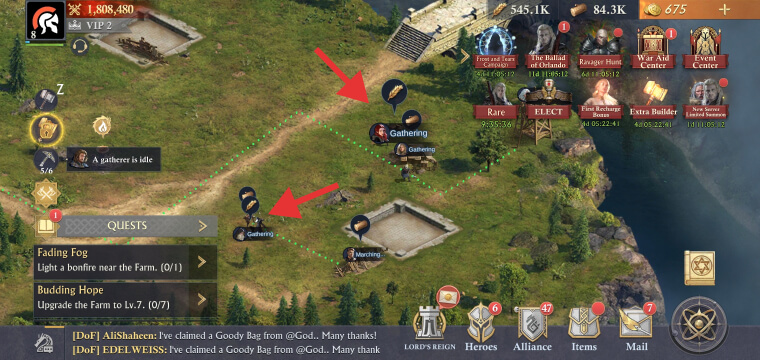
Each chapter has its own territory on which you can unlock new building slots. But before you can do that, you must clear all the obstacles barricades, boxes, towers, etc. in the way. This will give you more space to expand your kingdom and also resources such as Food or Wood.
To clear an obstacle, you only need to tap on it and send any of your gatherers, that are basically your unlocked heroes. Therefore, the more heroes you have the more obstacles you can clear simultaneously.
12. Ask for a teleport invite
If your castle is attacked repeatedly until your Wall Defense is reduced to zero, the system will automatically teleport you to a random location on the map. It is recommended to teleport back to your alliance hive. To avoid spending your Gold or an Advanced Teleport item, you can ask any R3 and above member of your alliance to send you a teleport invite.
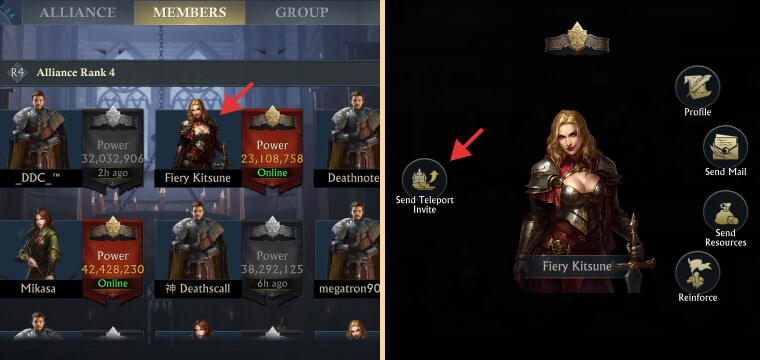
For that, the person who wants to send you the teleport invite needs to click the Alliance tab, go to the Members and find you in that list, click your in-game avatar, and select “Send Teleport Invite”. Soon after that, you will receive a message in your Alliance mail section and you need to open this message and click the “Teleport” button. You can then teleport back to your alliance territory.
11. Resource production before anything else
Resources are the key to success in King of Avalon. As soon as you start playing, your priority should be to build resource-producing buildings, the Farm, Sawmill, and Iron Mine, and upgrade them.
This will give you the resources needed to build and upgrade other buildings, research technologies, and train troops. Similarly, you should collect the resources produced daily by tapping the resource icons that pop up over the buildings I mentioned before.
10. Feed, and level up your dragon
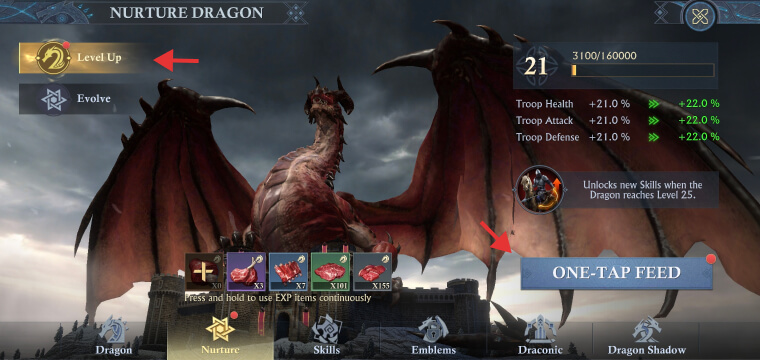
It’s nice to see how one of the most famous medieval TV shows, Game of Thrones, has inspired most of these popular RTS mobile games, especially with their dragons, and King of Avalon is no exception.
You can get a dragon by building the Dragon Lair and then feeding it with Piles of Meat to level it up. The more you increase its level and upgrade its building, the more powerful it becomes, and the more and better skills and features it unlocks. This beast will help you develop your city much faster and can join you in battles.
9. Change your display name and portrait
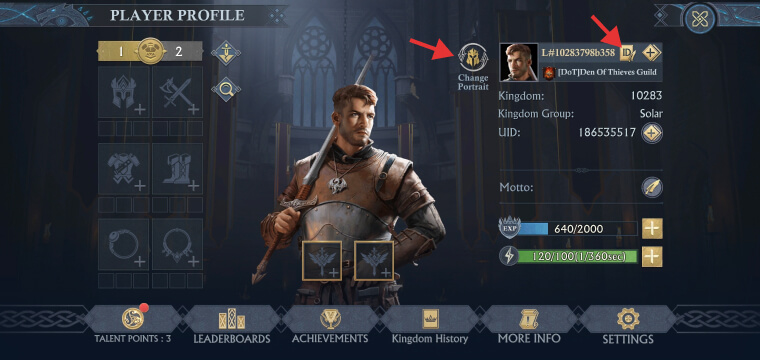
Changing your name and your portrait (avatar) should be among the first things you should do when starting King of Avalon. The game automatically assigns random names to new players, but you can customize both of them for free for the first time.
This will make it easy for your friends and allies to recognize you when they see you in the game. As for the portrait, you can either pick any of the existing portraits in the list or upload your own picture. Some portraits will require to be unlocked first.
8. Help and receive help from other members
The little hand-shaking icon you see on the bottom-right corner of your screen allows members to help each other out. Tapping this icon as soon as it’s visible (the red counter displays the number of members that require help), helps other members by decreasing their building construction, upgrade, and research times.
Each time you help members, you are rewarded with Individual Merit, the currency used to buy items in the Alliance Shop. Upgrading the Embassy building increases the number of Help you can receive.
7. Join rallies daily
Rallies are a great way to get your troops trained and gain rewards, by defeating one of the toughest monsters with your fellow alliance members. You can either create a rally or join those created by other players.
The only thing you should pay attention to, especially if you are far away from your other members, is to make sure that you join a rally within the right time frame. As for creating a rally, make sure you upgrade the Hall of War building as high as possible to increase the rally capacity for your allies.
6. Improve your heroes
One of the main strategies for winning battles in King of Avalon is to make sure you have heroes with the best stats and skills. Once you recruit them, you will need to level them up, upgrade their star level and unlock new skills.
You can do this by using EXP items, which can be obtained from events or missions such as the Lord’s Reign. You can also level up your heroes by fighting monsters visible all over the map. The higher the level of the monster, the better rewards you can get.
5. Train and upgrade troops regularly
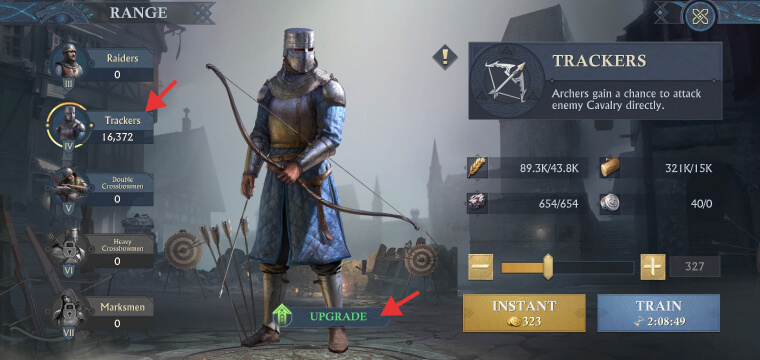
Training and upgrading your troops is an essential part of the game. It will give you an advantage over other battle players, so train new units regularly while maintaining the balance between infantry, cavalry, and archers.
You should also upgrade your troops’ specific building, the Barracks, Stable, and Range, to unlock higher tier troops and increase the stats of your units. Once you’ve unlocked a new tier, upgrade all your current troops (press the upgrade button as you see in the above screenshot) to that tier and start training new ones.
4. Keep your resources below the protection level
Once you lose your peace shield, you will be scouted constantly by other players. Some players prefer to scout before attacking, and if you have plenty of resources above your Storehouse protection level, you will be a prime target.
Therefore, you must keep your resources below the protection level to decrease the chances of being attacked. The more you upgrade the Storehouse, the higher the protection level will be, allowing you to store more resources safely.
3. Join or create a new alliance
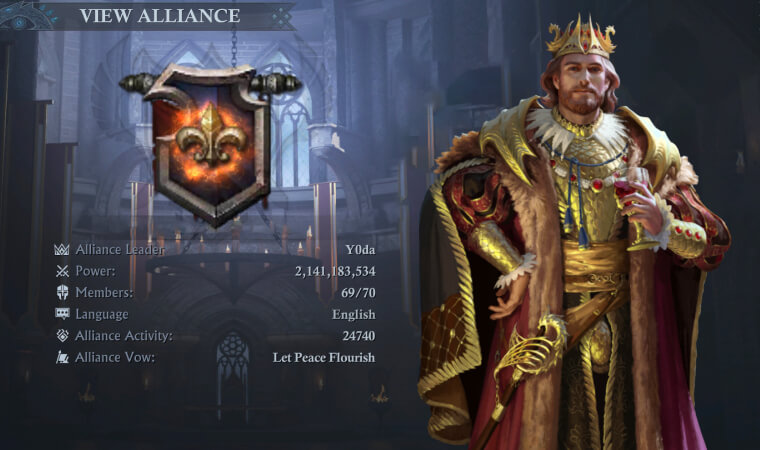
Alliances are the core of King of Avalon. As an Alliance member, you will have access to a wealth of rewards from various alliance-related events and activities and a series of other benefits that come with it. Another great advantage of joining an alliance is the camaraderie you build with other players and participate in exciting events and activities together.
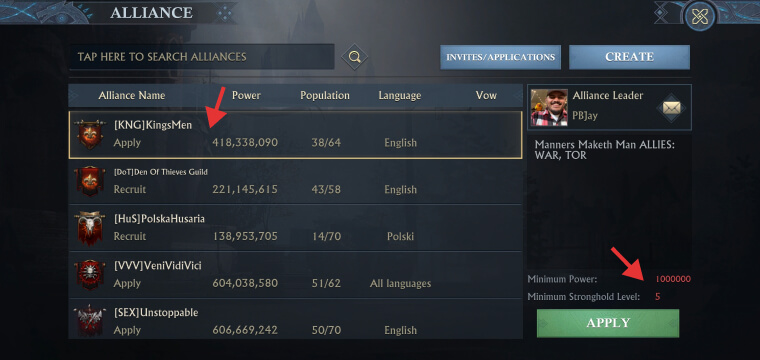
When looking for an Alliance to join, you should not only look for a powerful one but also look at the chosen language, as well as if it has an application and its requirements. Most top-ranking alliances require you to have a certain level and power before being able to apply.
On the other hand, if you are looking for a unique challenge, you can create your own alliance and invite your friends or other players to join.
2. Use your free daily Wishes
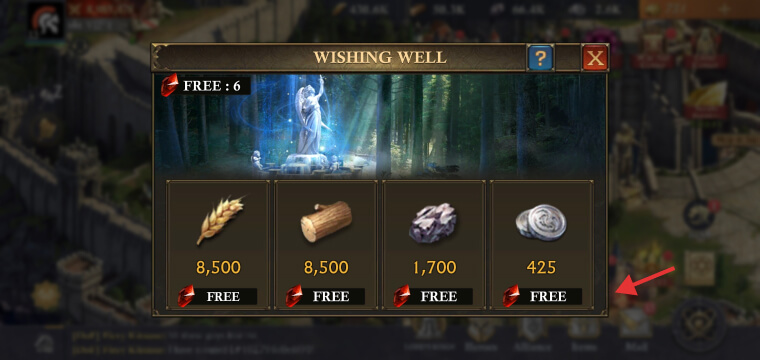
After reaching level 6 in King of Avalon, you can build the Wishing Well building. This special building allows you to collect certain types of resources a few times a day as free gifts.
The higher the level of this building, the more wishes you get every day. For instance, at level 1, the building offers you 5 daily wishes, while maximized (level 45) it gives you 11 wishes. These wishes reset every day, so make sure you use them up before they expire.
1. Use your healing coins
The Hospital offers two different ways to heal your wounded troops, the City Hospital and the Alliance Hospital. After a PvE or PvP battle, your troops are sent to the Alliance Hospital, where you can use Healing Coins to instantly heal your troops, instead of using resources.
The Healing Coins are auto-generated after use until they reach the maximum allowed amount. This amount is decided by the level of your Hospital building.
Once the wounded capacity is reached, your troops are sent to your City’s Hospital (same building but separate sections) where you can use only resources or gold to heal them. Upgrading the hospital will not only increase the wounded capacity and healing speed but also the daily maximum allowed amount of Healing Coins.
